
No idea why.......
Re: No idea why.......
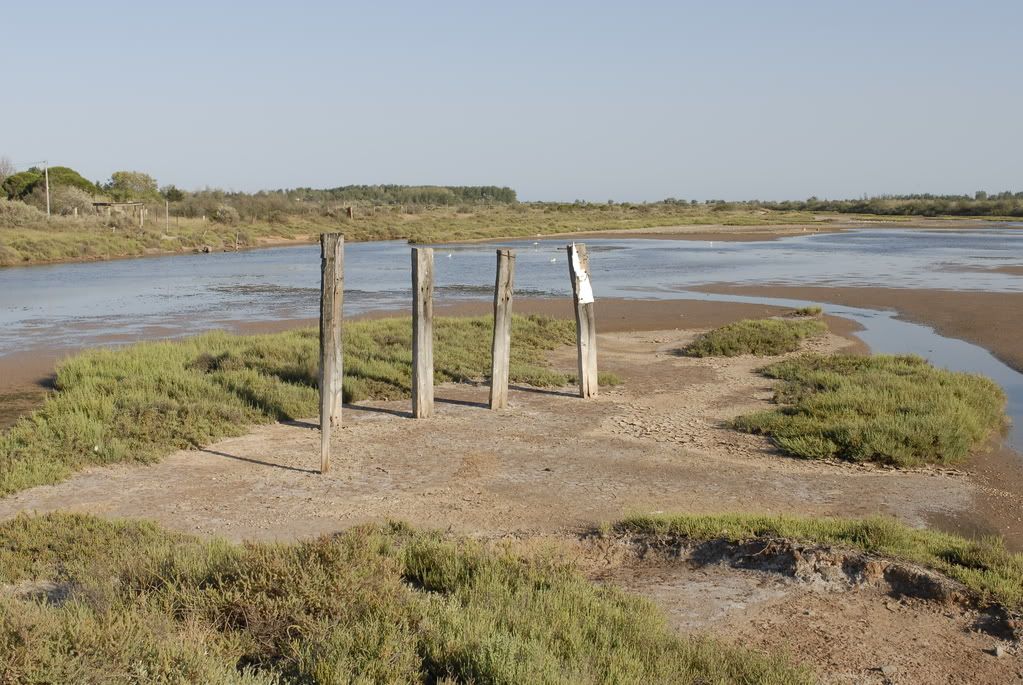
I have no idea either. But, I decided to play with it, since it was coming up as aRGB. What do you think of my changes? I hope you don't mind!
Oops, sorry for the watermark! My SmugMug site is set to do that on all images I upload.

Oops, sorry for the watermark! My SmugMug site is set to do that on all images I upload.
Re: No idea why.......
No problem Jon. I cant remember what it looked like to be sure. This was taken with D200
Am trying out some settings I found from Moose Peterson on the D3.
Have to admit I am heading in the direction of the Nikon defaults.
Am trying out some settings I found from Moose Peterson on the D3.
Have to admit I am heading in the direction of the Nikon defaults.
Re: No idea why.......
I saw your reply on the other forum. I still think aRGB can be used, but only if you are printing your own images. For posting on the web, and using a commercial printer, I think it works better with sRGB. But, you should always experiment, and try things out for yourself!Sparkey wrote:No problem Jon. I cant remember what it looked like to be sure. This was taken with D200
Am trying out some settings I found from Moose Peterson on the D3.
Have to admit I am heading in the direction of the Nikon defaults.
Re: No idea why.......
If anyone is interested on how to do this, here is how it is done
First, Using Photoshop levels, I increased the darkness by .20 of Sparkey's original photo. Then I saved it using a different name. I didn't do anything to the colors as they were already in the file.

1-Put the original and dark images on the screen at the same time. Select the dark
frame and press CTRL-A. Press CTRL-C to copy it. Close the dark
picture as you won't need it anymore.
2-Select the light frame and press CTRL- V to paste the dark frame
into it.
3-Make a Layer Mask. This is done by clicking on the second icon
on the lower left of the Layer's palette. A white rectangle will
appear next to the image on Layer 1 layer.
4-Click on the background layer on the palette and press CTRL-A
then CTRL-C to copy it to the clipboard. Hold down the ALT key
and click on the white mask.
5-The whole image will turn white. Press CTRL- V and the contents
of the clipboard will show as a B/W
6-Go to Filter/Blur/GaussianBlur and set the Radius to 40 pixels.
7-Click on the background layer and you should wind up with something that looks like this.

8-Flatten the image. At this point you can make any other adjustment you feel is necessary.
9- Save image.
First, Using Photoshop levels, I increased the darkness by .20 of Sparkey's original photo. Then I saved it using a different name. I didn't do anything to the colors as they were already in the file.
1-Put the original and dark images on the screen at the same time. Select the dark
frame and press CTRL-A. Press CTRL-C to copy it. Close the dark
picture as you won't need it anymore.
2-Select the light frame and press CTRL- V to paste the dark frame
into it.
3-Make a Layer Mask. This is done by clicking on the second icon
on the lower left of the Layer's palette. A white rectangle will
appear next to the image on Layer 1 layer.
4-Click on the background layer on the palette and press CTRL-A
then CTRL-C to copy it to the clipboard. Hold down the ALT key
and click on the white mask.
5-The whole image will turn white. Press CTRL- V and the contents
of the clipboard will show as a B/W
6-Go to Filter/Blur/GaussianBlur and set the Radius to 40 pixels.
7-Click on the background layer and you should wind up with something that looks like this.
8-Flatten the image. At this point you can make any other adjustment you feel is necessary.
9- Save image.
Three Scores and 14 years old and still going strong.